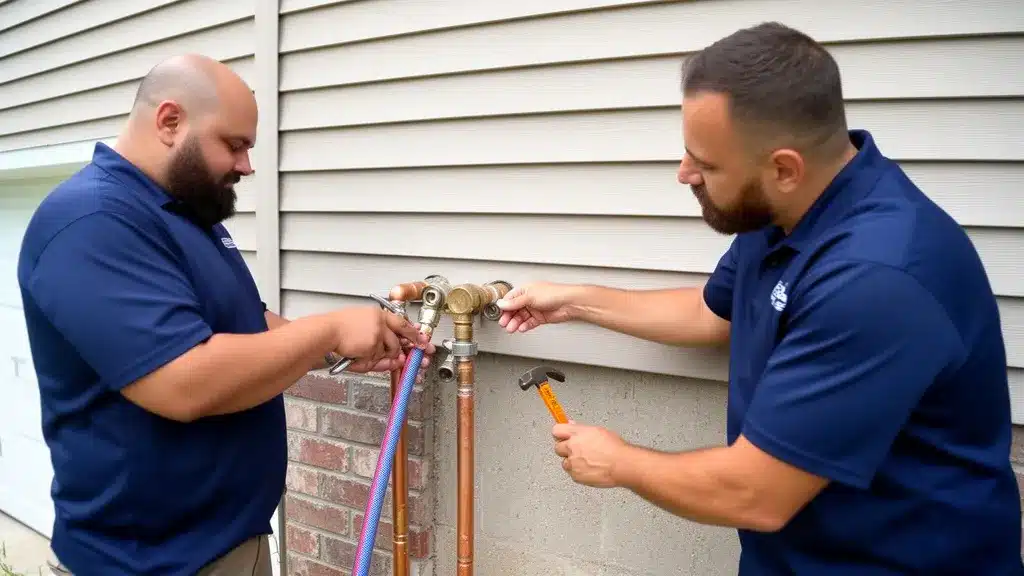
Most Sydney homeowners never think about the connection behind their outdoor tap until they face a leak, replacement job, or urgent issue related to burst pipes Sydney properties can experience when outdoor plumbing fails. The difference between a threaded and a soldered spigot matters when you need fast repairs—or when you want to avoid unnecessary damage to your walls and pipes. One method lets you unscrew the valve with a wrench; the other demands a torch, flux, and careful soldering to copper pipe.
This guide walks you through the simple checks you can perform yourself, explains what each connection type looks like, and outlines when it’s time to call a licensed plumber. By the end, you’ll know exactly how to inspect your outdoor spigot and make an informed decision about repair or replacement.
Key Takeaways
- Threaded spigots screw onto pipe threads and can be removed with a wrench, while soldered spigots are permanently bonded to copper with heat and flux.
- You must inspect the connection from inside your home—usually in a basement, crawl space, or wall cavity—to confirm the attachment method.
- Look for visible hex flats, union nuts, or Teflon tape as signs of a threaded connection; smooth copper joints indicate soldering.
- Attempting to unscrew a soldered spigot can crack pipes or flood your wall cavity, so always confirm the connection type first.
- Our licensed team provides same-day spigot inspections and replacements across Sydney, with clear upfront pricing and no call-out fee from 7 am to 3 pm weekdays.
Understanding Outdoor Spigot Connections: Threaded vs Soldered
An outdoor spigot—also called a hose bib or tap—connects to your home’s plumbing in one of two ways: threaded or soldered. Threaded connections use tapered pipe threads that screw together, sealed with Teflon tape or pipe sealant. Soldered connections, often called sweat joints, bond the valve body directly to copper pipe using heat, flux, and solder.
The choice between threaded and soldered depends on the pipe material, local plumbing codes, and the installer’s preference. Copper supply lines in Sydney homes often use soldered joints for a permanent, leak-resistant seal. Galvanized steel or brass fittings typically rely on threaded fasteners, which allow for easier removal and replacement without cutting pipe.
Knowing which connection type you have saves time, prevents damage, and helps you decide whether a DIY fix is realistic or whether a licensed plumber should handle the job. Misidentifying the connection can lead to cracked pipes, water damage inside walls, or a spigot that won’t budge no matter how hard you turn the wrench.
How to Inspect Your Outdoor Spigot for Threaded or Soldered Connections
The only reliable way to confirm your connection type is to inspect the fitting from inside your home. Most outdoor spigots pass through an exterior wall, with the valve body outside and the supply connection inside a basement, crawl space, or wall cavity. You’ll need a torch or work light, and you may need to remove insulation or access panels to see the joint clearly.
1. Locate the Indoor Side of the Spigot
Start by identifying where your outdoor tap exits the wall. Trace the same wall from inside your home, looking for exposed copper or galvanized pipe near the spigot location. In many Sydney homes, the connection sits just above the slab in a basement or utility room.
2. Look for Hex Flats or Union Nuts
A threaded connection will show visible hex flats—six-sided surfaces—on the valve body or a union nut between the valve and the pipe. These flat surfaces accept a wrench and indicate that the fitting screws on and off. You may also spot white Teflon tape or pipe dope on the threads.
3. Check for Smooth Copper Joints
Soldered connections appear as smooth, continuous joints where the valve body meets the copper pipe. You’ll see a ring of shiny or dull solder around the joint, and no visible threads or hex surfaces. The pipe and valve look like a single piece of metal.
4. Test for Movement
If you’re still unsure, gently try to rotate the valve body with a wrench—do not apply force. A threaded connection may turn slightly before tightening; a soldered joint will not move at all. Stop immediately if you feel resistance, as forcing a soldered joint can crack the copper or flood the wall.
5. Measure the Pipe Diameter
Most outdoor spigots connect to 1/2-inch copper or 3/4-inch galvanized pipe. Threaded connections on copper often use a male adapter soldered to the pipe, then a female thread on the valve. Soldered connections bond the valve directly to the copper stub without any adapter.
6. Inspect for Corrosion or Paint
Layers of paint or corrosion can hide threads and make a threaded connection look soldered. Use a wire brush or scraper to clean the joint, then re-examine for hex flats or thread lines. Corrosion on galvanized threads can seize the fitting, mimicking a soldered bond.
7. Consult Installation Records or Photos
If your home was recently renovated or replumbed, check any plumbing records, invoices, or photos from the installer. Many licensed plumbers document the connection type and pipe material, especially for compliance with Australian Standards AS/NZS 3500.
Why the Connection Type Matters for Repairs and Replacements
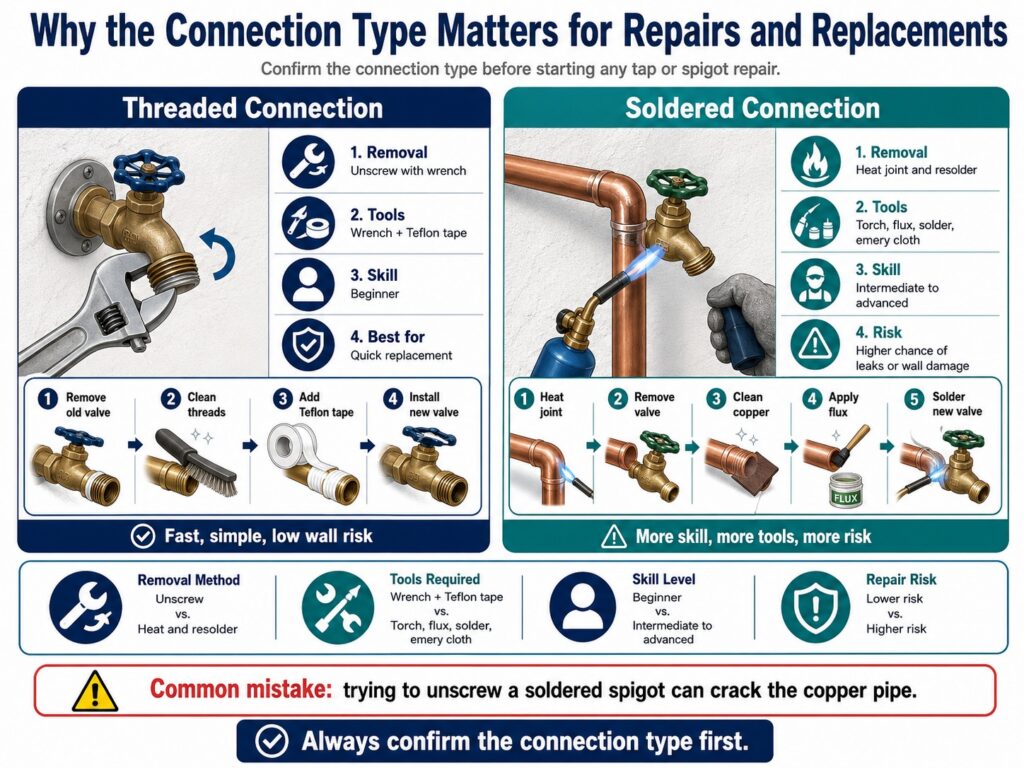
Threaded spigots allow for straightforward removal and replacement without cutting pipe or using a torch. You can unscrew the old valve, clean the threads, apply fresh Teflon tape, and thread on a new unit—often in under 30 minutes. This method suits DIY repairs and reduces the risk of water damage inside walls.
Soldered connections demand more skill and equipment. You’ll need a propane or MAPP gas torch, flux, solder, emery cloth, and safety gear. The process involves heating the joint until the old solder melts, pulling the valve off, cleaning the copper, applying flux, and resoldering the new valve. Mistakes can burn insulation, crack pipes, or create leaks that require wall repairs.
| Connection Type | Removal Method | Tools Required | Skill Level |
|---|---|---|---|
| Threaded | Unscrew with wrench | Adjustable wrench, Teflon tape | Beginner |
| Soldered | Heat joint, pull valve, resolder | Torch, flux, solder, emery cloth | Intermediate to advanced |
Attempting to unscrew a soldered spigot is the most common error we see across Sydney. Homeowners assume every tap threads off, apply excessive force, and crack the copper pipe inside the wall. The result is an emergency call, water damage, and a repair bill that exceeds the cost of a simple inspection. Always confirm the connection type before you start.
Common Signs Your Outdoor Spigot Uses Threaded Fasteners
Threaded connections often appear on galvanized steel or brass pipe systems, though they can also attach to copper via a threaded adapter. Look for these clues when inspecting your spigot from inside the wall.
- Visible hex flats: Six-sided surfaces on the valve body or union nut that accept a wrench.
- Teflon tape residue: White or yellow tape wrapped around the threads, visible at the joint.
- Pipe dope or sealant: Gray or white paste on the threads, sometimes oozing from the connection.
- Galvanized or brass pipe: Threaded connections are standard on these materials in older Sydney homes.
- Union or coupling: A separate fitting between the valve and pipe, held together with hex nuts.
Threaded outdoor spigots are easier to service and replace, making them a practical choice for homeowners who prefer DIY maintenance. If you’re upgrading from a soldered connection, our team can install a threaded adapter to simplify future repairs.
Identifying Soldered Connections on Copper Pipe
Soldered spigots are the norm in modern Sydney plumbing, especially where copper supply lines run through walls. The joint looks clean and permanent, with no visible threads or mechanical fasteners. Here’s what to look for when you suspect a soldered connection.
- Smooth copper joint: The valve body flows directly into the pipe with no visible seam or thread line.
- Solder ring: A shiny or dull band of solder around the joint, sometimes with flux residue.
- No hex flats: The valve body is round or cylindrical, with no surfaces for a wrench to grip.
- Copper pipe only: Soldered connections are used exclusively on copper, not galvanized or PVC.
- Permanent appearance: The joint looks like a single piece of metal, with no removable components.
Soldered connections offer superior leak resistance and comply with Australian Standards for permanent plumbing installations. If you need to replace a soldered spigot, our licensed plumbers carry the torches, flux, and quality solder required to complete the job safely and to code.
Tools and Materials for Removing Each Connection Type
The right tools depend entirely on whether your spigot is threaded or soldered. Using the wrong approach wastes time and risks damage to your plumbing system. Here’s a quick comparison of what you’ll need for each method.
| Task | Threaded Connection | Soldered Connection |
|---|---|---|
| Remove old valve | Adjustable wrench, pipe wrench | Propane torch, heat-resistant gloves |
| Clean joint | Wire brush, cloth | Emery cloth, flux brush |
| Seal or bond | Teflon tape, pipe dope | Flux, lead-free solder |
| Install new valve | Wrench, thread sealant | Torch, solder, wet cloth |
If you’re not confident working with a torch or if your spigot sits inside a finished wall, call a licensed plumber. We provide same-day service across Sydney, with clear upfront pricing and no call-out fee from 7 am to 3 pm on weekdays. Our team brings the right tools for both threaded and soldered connections, so you won’t face delays or guesswork.
Step-by-Step: Replacing a Threaded Outdoor Spigot
Replacing a threaded spigot is straightforward if you’ve confirmed the connection type and gathered the correct tools. Follow these steps to avoid leaks and ensure a secure fit.
1. Turn Off the Water Supply
Locate the isolation valve on the supply line feeding your outdoor tap, usually inside the home near the spigot. Turn the valve clockwise until it stops, then open the outdoor tap to drain any remaining water from the line.
2. Remove the Old Spigot
Use an adjustable wrench or pipe wrench to grip the hex flats on the valve body. Turn counterclockwise to unscrew the spigot from the pipe. If the fitting is seized, apply penetrating oil and wait 10 minutes before trying again.
3. Clean the Threads
Inspect the pipe threads for old Teflon tape, corrosion, or debris. Use a wire brush to clean the threads, then wipe with a dry cloth. Damaged threads may require a thread file or a new threaded adapter.
4. Apply Teflon Tape
Wrap the male pipe threads clockwise with two to three layers of Teflon tape, starting at the base and working toward the tip. Press the tape firmly into the threads to prevent it from bunching when you screw on the new valve.
5. Thread On the New Spigot
Hand-tighten the new valve onto the pipe threads, turning clockwise. Once snug, use a wrench to turn an additional one to two turns—do not overtighten, as this can crack the valve body or strip the threads.
6. Test for Leaks
Turn the water supply back on and open the outdoor tap. Check the connection for drips or seepage. A small weep is normal during the first few seconds; persistent leaks mean you need to remove the valve, add more Teflon tape, and reinstall.
Step-by-Step: Replacing a Soldered Outdoor Spigot
Soldered connections require heat, flux, and careful technique. If you’re not experienced with torch work, this job is best left to a licensed plumber to avoid fire risk and water damage.
1. Turn Off the Water and Drain the Line
Close the isolation valve and open the outdoor tap to release pressure. Use a wet cloth or spray bottle to dampen any nearby wood framing or insulation, reducing fire risk when you apply the torch.
2. Heat the Existing Joint
Ignite your propane torch and apply the flame to the solder joint, moving the tip around the circumference. Heat until the solder turns shiny and liquid, then pull the valve off the pipe with pliers. Be careful—the copper and valve body will be extremely hot.
3. Clean the Copper Pipe
Once the pipe cools, use emery cloth to polish the outside of the copper stub until it’s bright and smooth. Remove all old solder, flux residue, and oxidation. A clean surface is essential for a leak-free joint.
4. Apply Flux
Brush a thin layer of plumbing flux onto the cleaned copper and the inside of the new valve’s socket. Flux prevents oxidation during heating and helps the solder flow evenly into the joint.
5. Assemble and Heat the New Joint
Slide the new valve onto the copper pipe, ensuring it’s fully seated. Apply the torch to the joint, heating the copper evenly. When the flux starts to bubble, touch the solder wire to the joint—not the flame. The solder should melt and flow into the gap by capillary action.
6. Cool and Test
Remove the flame once you see a complete ring of solder around the joint. Let the pipe cool naturally—do not use water, as rapid cooling can crack the solder. Turn the water back on and check for leaks. A properly soldered joint will be watertight immediately.
When to Call a Licensed Plumber for Spigot Work
Even confident DIYers should recognize when a job exceeds their skill or tool set. Outdoor spigot work involves pressurized water, fire risk, and potential wall damage—mistakes can be costly. Call a licensed plumber if you encounter any of these situations, especially if you need help from a plumber North Rocks residents can rely on for safe outdoor tap and pipe repairs.
- You can’t access the indoor connection: Spigots hidden behind finished walls or inaccessible crawl spaces require professional tools and techniques.
- The joint is corroded or seized: Forcing a corroded fitting can crack pipes or flood your wall cavity.
- You’re not comfortable using a torch: Soldering requires practice, and a single mistake can ignite insulation or create a weak joint that fails under pressure.
- The spigot is part of a larger leak or burst: If you’re replacing the tap due to a leak inside the wall, a licensed plumber can inspect for hidden damage and ensure compliance with AS/NZS 3500.
- You need a frost-proof or backflow-prevention valve: These specialized spigots have strict installation requirements and must be installed by a licensed professional in many Sydney councils.
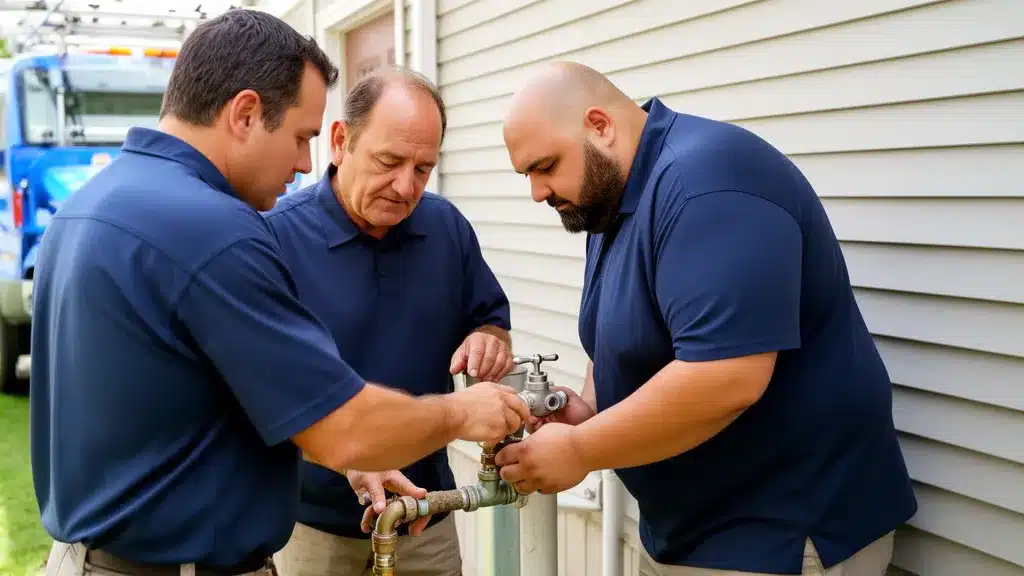
Our team provides same-day spigot inspections and replacements across Sydney, including support from a plumber Kellyville Ridge homeowners can call for outdoor tap repairs, leaks, and replacement advice. We’ll confirm the connection type, present your options, and complete the work with a lifetime labour warranty—so you can trust the repair long after we leave. Call 0493 824 176 or book online for a fast, no-obligation quote.
Threaded Inserts and Fasteners in Plumbing Applications
Threaded inserts and fasteners play a supporting role in outdoor spigot installations, especially when mounting the valve to a wall or attaching a vacuum breaker. Brass threaded inserts allow you to secure a spigot mounting flange to timber or masonry without splitting the material. Stainless steel threaded fasteners resist corrosion in Sydney’s coastal climate, ensuring your spigot stays firmly attached through years of hose connections and seasonal weather.
When replacing a spigot, check the condition of any mounting bolts or threaded rivets that hold the flange to the wall. Corroded or stripped fasteners can cause the valve to sag, stressing the pipe connection and leading to leaks. Our plumbers carry a range of corrosion-resistant threaded bolts and M6 threaded rod, so we can replace worn hardware and restore a secure, code-compliant mount during the same visit.
Preventing Future Issues with Your Outdoor Spigot
Once you’ve confirmed your connection type and completed any repairs, a few simple maintenance steps will extend the life of your outdoor tap and prevent leaks or bursts. These practices apply to both threaded and soldered spigots across Sydney homes.
- Insulate exposed pipes: Wrap foam insulation around any copper or galvanized pipe inside wall cavities to reduce the risk of freezing during cold snaps.
- Install a vacuum breaker: This device prevents backflow contamination and is required by many Sydney councils for outdoor taps connected to garden hoses.
- Disconnect hoses in winter: Leaving a hose attached traps water in the spigot body, increasing the chance of freeze damage and cracked valves.
- Check for drips annually: A slow drip from the spout or packing nut can waste hundreds of liters and signal a worn washer or loose packing.
- Schedule a plumber inspection: Our team can test your spigot, check the connection for corrosion, and replace washers or seals before they fail—often during the same visit as a routine tap repair or hot water service.
Proactive maintenance costs less than emergency repairs and protects your home from water damage. If you’re unsure about the condition of your outdoor spigot or you’ve noticed a leak, our licensed plumbers provide same-day inspections with clear, upfront pricing—and no call-out fee from 7 am to 3 pm on weekdays.
Conclusion
Knowing whether your outdoor spigot is threaded or soldered can help you avoid costly mistakes during repairs or replacement. Threaded connections may be easier to remove, while soldered connections require proper tools, heat, and plumbing experience. Checking the connection type first helps protect your pipes, walls, and home from unnecessary water damage.
If you are unsure what type of spigot connection you have, Anton’s Plumbing & Gas can inspect it and recommend the safest repair option. Our licensed plumbers provide reliable outdoor tap repairs and replacements across Sydney with clear upfront pricing. Call 0493 824 176 or book online today to arrange a professional plumbing inspection.
Related Articles
- Faucet Cartridge Extension Identification Guide for Plumbing Repairs
- How to Fix a Leaking Shower Elbow Before It Damages Your Wall
- How to Remove a Stuck Kitchen Tap Hose Attachment Safely
FAQs
What Is The Difference Between Threaded And Soldered Outdoor Spigots?
Threaded outdoor spigots have visible threads on the connection points, allowing for easy attachment of hoses and fittings. Soldered spigots, on the other hand, are joined to pipes using a soldering process, providing a more permanent connection. Our experienced team can help you identify which type you have and recommend the best options for your plumbing needs.
How Do You Install A Threaded Outdoor Spigot?
To install a threaded outdoor spigot, first, ensure the water supply is turned off. Then, remove the old spigot if applicable, clean the pipe threads, and apply plumber’s tape to prevent leaks. Next, screw the new spigot onto the pipe, ensuring a tight fit. Finally, turn the water supply back on to check for leaks. For a hassle-free installation, consider contacting our skilled professionals at Antons Plumbing & Gas.
Can You Convert A Soldered Spigot To A Threaded One?
Yes, you can convert a soldered spigot to a threaded one, but it involves cutting the existing soldered pipe and installing a threaded fitting. This process requires skill and knowledge of plumbing codes, so we recommend seeking assistance from our qualified team to ensure a safe and compliant installation.
Which Is Better For Outdoor Spigots: Threaded Or Soldered?
The choice between threaded and soldered outdoor spigots depends on your specific needs. Threaded spigots allow for easy attachment and removal of hoses, making them more versatile. Soldered spigots provide a permanent connection and may be less prone to leaks over time. Our experienced plumbers can help you decide which option best suits your outdoor plumbing requirements.
How Do You Fix A Leaking Soldered Outdoor Spigot?
To fix a leaking soldered outdoor spigot, you typically need to cut away the old spigot and re-solder a new one in its place, ensuring a proper seal. This process requires specialized tools and skills. If you’re experiencing a leak, our expert team at Antons Plumbing & Gas can efficiently diagnose and repair the issue, ensuring your outdoor plumbing is leak-free.